

Developing applications can be complex. Different technologies are involved, the complexity that comes from using the tools, and the need to know how to use them. To develop SAP software, SAP developers often spend extra time managing backend, frontend, and mobile components separately. SAP Build Code solves this by offering a unified environment for building full-stack applications using the SAP Cloud Application Programming model, SAP Fiori, and SAPUI5. It includes guided development based on SAP best practices and supports mobile-ready apps with a single codebase. Also, it comes with SAP Joule, a built-in generative AI assistant. SAP Joule helps generate data models, services, and test data automatically, making development faster and easier. Using a customer support application as a case study, this blog post guides you on how to create a full-stack application using SAP Build Code.
Prerequisites
SAP BTP Trial Account
Subscribe to SAP Build Code
In this blog, we need SAP Build Code and SAP Business Application Studio. We will use the SAP Booster to streamline the process of setting up these two applications. The Booster will create a new subaccount and add all required entitlements.
Run the SAP Build Code Booster
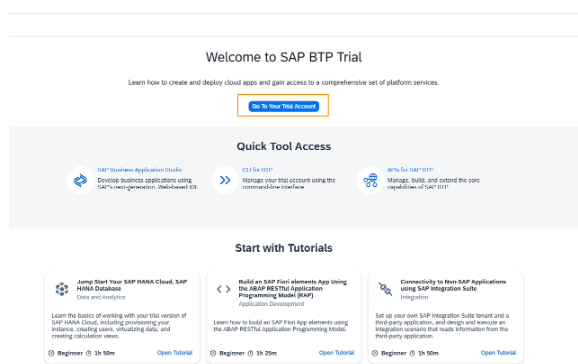
- Log on to your SAP BTP global account. Choose Go To Your Trial Account.
- If you have SAP Business Application Studio in any of your subaccounts, make sure you unsubscribe from it.
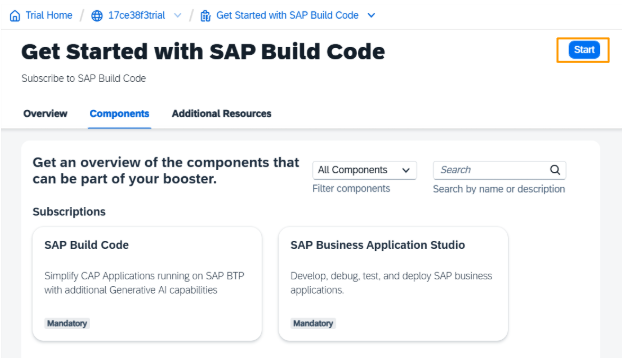
- In the left navigation pane, click Boosters, filter for sap build code. Choose the tile

- The booster opens. You will see three tabs overview, components, and additional resources. Click Start.
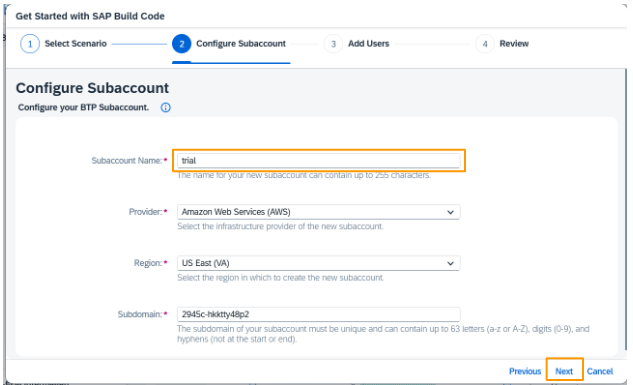
- Choose Create Subaccount and click Next

- Enter Subaccount Name. Here, it is trial. Select other relevant options. Click Next
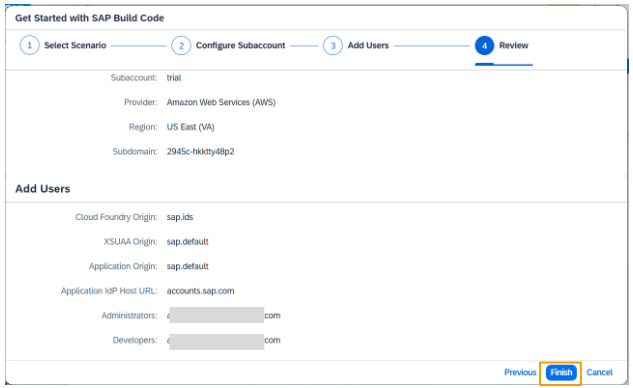
- Enter Administrators and Developers users. Select Next

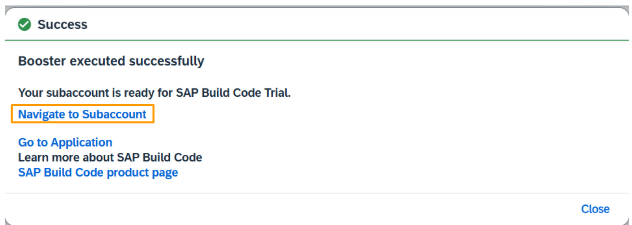
- Select Finish
- Click Navigate to Subaccount
- The new subaccount is created. Choose the trial tile

- From the left navigation pane, select Services > Instances and Subscriptions. Choose the SAP Build Code link

Create a New Project
- In the SAP Build lobby, click Create, and from the dropdown list, select Create Select the Application tile. Click Next
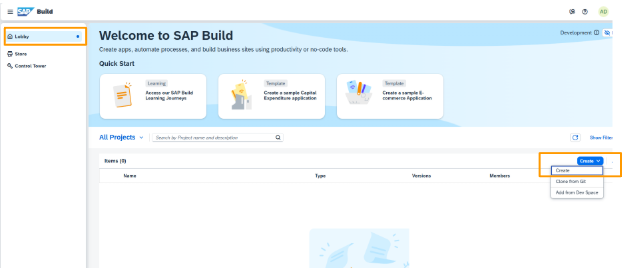
- Select the Application tile, Click Next
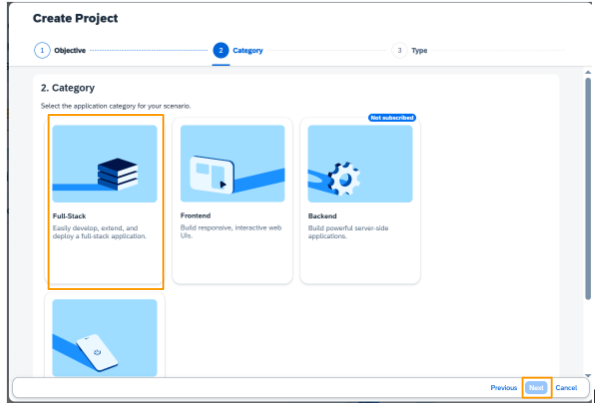
3. Select Full-Stack. Click Next
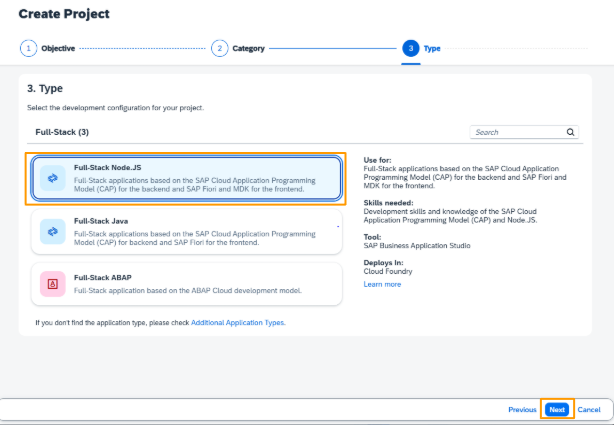
- Select the type Full Stack application. Here, it is Node Js. Then, click Next
- Enter project name, here, it is Customer_support. Select the Dev Space you want the project to reside. If you don't already have one, SAP Build Code will automatically create a new one for you.

- Click Review to display summary of your selections.

- Click Create. The project takes a few moments to be created
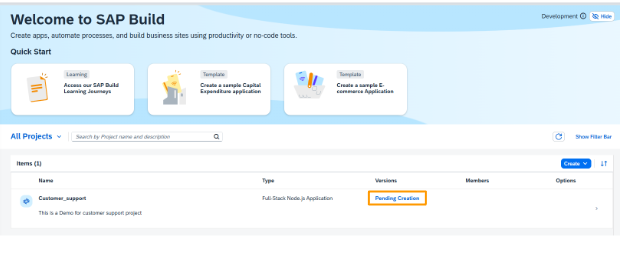
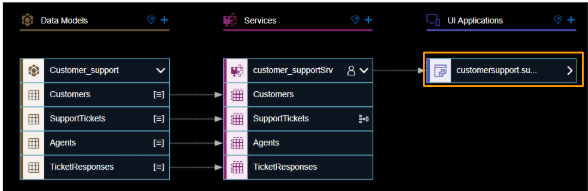
- Project has been created successfully, click the project link to open it.
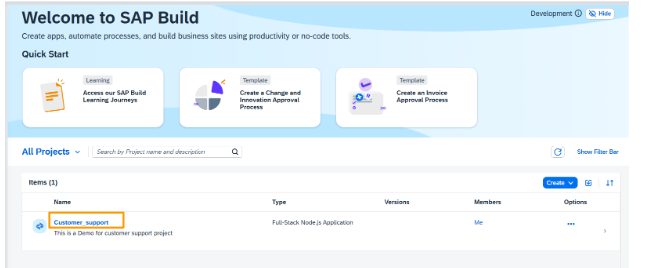
- The project opens in SAP Business Application Studio which the development environment of SAP Build Code.
Developing the SAP CAP Application with Joule
Create a CAP application
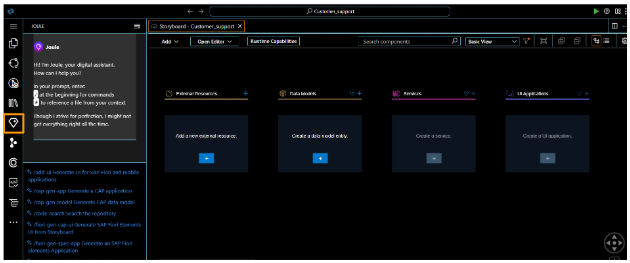
- Your SAP Business Application Studio is already open. Choose Joule, the digital assistant, from the activity bar.
- Copy the prompt below:
Create a customer support ticketing system with sample data and application logic.
- At the bottom of the Joule view, select the '/cap-gen-app` slash command.

4. Paste the code copied in step 2 into the text field below. Click the arrow icon to send the prompt to Joule.

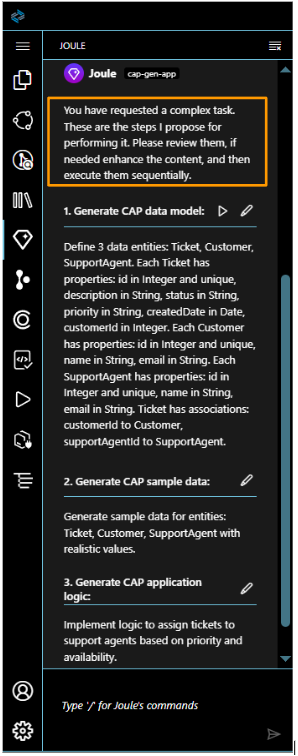
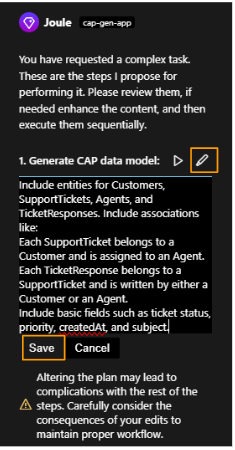
- Due to the complexity of the task, Joule splits the prompt into three steps (CAP data model, CAP sample data, CAP application logic), providing suggestions for the prompt for each step.
If Joule does not give exact response to the prompt, enhance it.
You are going to edit the prompt for a clearer description that aligns better with the data model's requirements.
- Copy the prompt below:
Include entities for Customers, SupportTickets, Agents, and TicketResponses. Include associations like:
Each SupportTicket belongs to a Customer and is assigned to an Agent.
Each TicketResponse belongs to a SupportTicket and is written by either a Customer or an Agent.
Include basic fields such as ticket status, priority, createdAt, and subject.
- Click the pen icon🖊 to edit the CAP data model prompt and replace with the one you just copied. Then click Save.
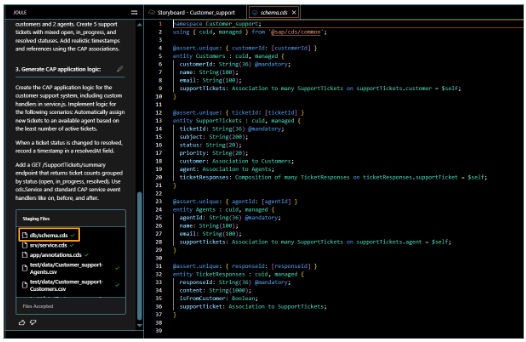
- Click the arrow icon to run the step and generate the CAP data model.

- The staging files are generated and are displayed below your prompt. Click on the file name to view them.
Now, you are going to edit the sample data to match the requirements.
- Copy the prompt below.
Create sample data. The entities are Customers, Agents, SupportTickets, and TicketResponses.
Provide at least 3 sample customers and 2 agents.
Create 5 support tickets with mixed open, in_progress, and resolved statuses.
Add realistic timestamps and references using the CAP associations.
- Click the pen icon 🖊to edit the CAP sample data. Replace the prompt with the one copied in step 10. Then Click Save.

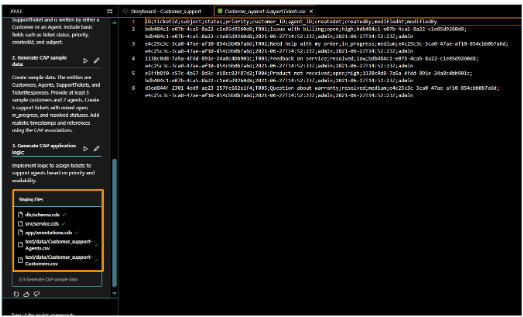
- Click the arrow icon to run the step and generate the CAP sample data.
The CSV files are created. Click any of the files from the Staging Files list to open for review.
Now You are going to add application logic
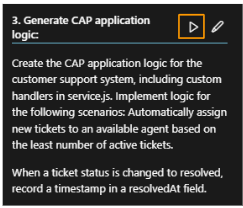
- Copy the prompt below.
Create the CAP application logic for the customer support system, including custom event handler in service.js.
Implement logic for the following scenarios:
Automatically assign new tickets to an available agent based on the least number of active tickets.
When a ticket status is changed to resolved, record a timestamp in a resolvedAt field.
- Click the pen icon🖊 to edit the CAP application logic. Replace the prompt with the one you have just copied. Then Click Save.

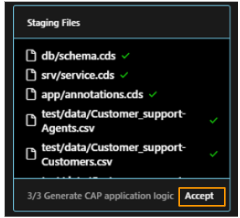
- Click the arrow icon to run the step and generate the CAP application logic.
- Accept the code.
Add UI to the Application
You are going to create UIs to test the content created for the customer support application. To achieve this, you need to create an SAP Fiori UI element. In this section, we have included four (4) UI to be added to the application.
UI for Support Ticket Management
This UI enables showing all replies related to a ticket in a section of the Object Page.
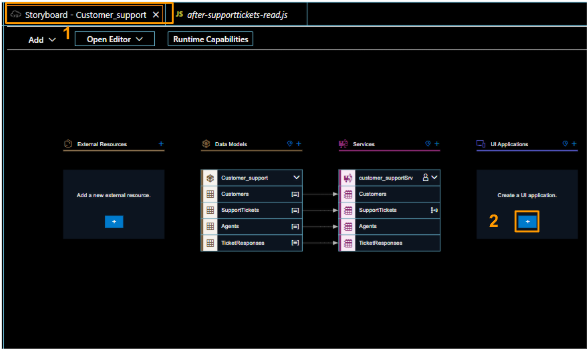
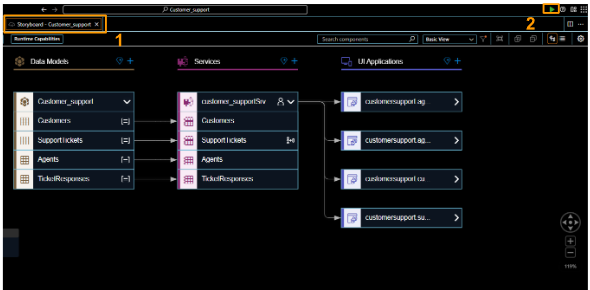
- Go to the Storyboard (1), choose Create a UI application (2).
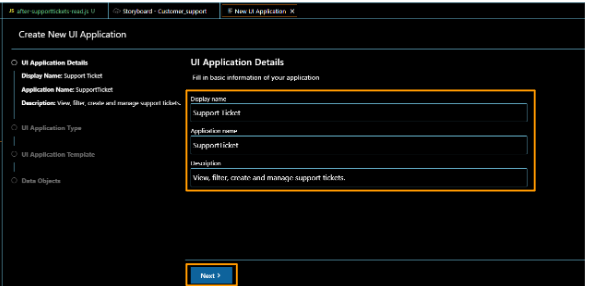
- Set the Display name to Support Ticket. The application name is automatically created with the display name. Set the Description to View, filter, create and manage support tickets. Then click Next.
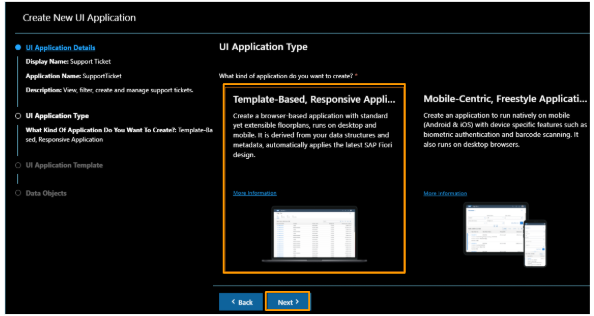
- Select Template-Based Responsive Application as the UI Application type. Then click Next.
- For the UI application template, select List Report Page. Then click Next.

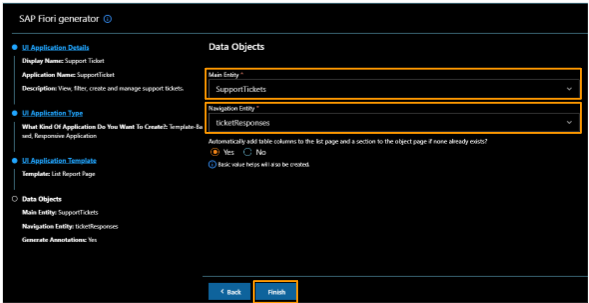
- For the Data Objects, select SupportTickets as the Main entity,TicketResponses as the Navigation entity. Then click Finish.
Note: Navigation entity enables showing all replies related to a ticket in a section of the Object Page.
- The dependencies are being installed. Therefore, It takes a few moments for the UI to be created.
- Once the UI is created, the Page Map opens, providing options for further editing the UI.

UI for Customer Self-Service
It enables customers to see and respond to messages within their ticket. For implementation, repeat steps in the UI for Support Ticket Management with the following details.
- Display name: Customer Self-Service
- Description: Submit and track your support tickets. View status, add replies.
- UI Application type: Template-Based Responsive Application
- UI Application Template: List Report Page
- Main Entity: SupportTickets
- Navigation entity: TicketResponse
UI for Agent Management
It allows admin to view all tickets assigned to an agent. For implementation, repeat steps in the UI for Support Ticket Management with the following details.
- Display name: Agents Management
- Description: View all tickets assigned to an agent
- UI Application type: Template-Based Responsive Application
- UI Application: Template: List Report Page
- Main Entity: Agents
- Navigation entity: SupportTickets
UI for Agent Workspace
It gives agents full visibility into the ticket history and conversation. For implementation, repeat steps in the UI for Support Ticket Management with the following details.
- Display name: Agents Workspace
- Description: View and manage tickets assigned to you.
- UI Application type: Template-Based Responsive Application
- UI Application: Template: List Report Page
- Main Entity: SupportTickets
- Navigation entity: TicketResponses
Testing the full-Stack application in SAP Build Code
We want to to validate the core functionality of the full-stack application. In this blog, we will use the Support Ticket Management system app as an example. The app is designed for agents and admins to manage customer support tickets using a List Report and Object Page interface. The test will cover navigating to ticket details and viewing associated responses.
- Go to the Storyboard tab (1). Click the arrow icon to preview the application (2).
- The application begins to execute in the terminal.

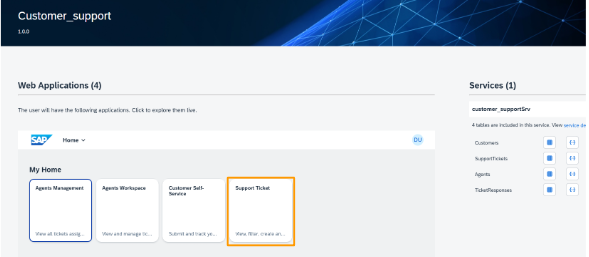
- The application's preview is displayed. Click the Support Ticket application.
- Click on Go to view all support tickets.

- Click on Ticket IDT003 to display all associated ticket responses.
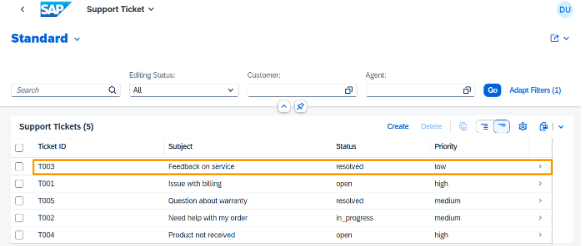
- Ticket ID T003 displays with Ticket Response.
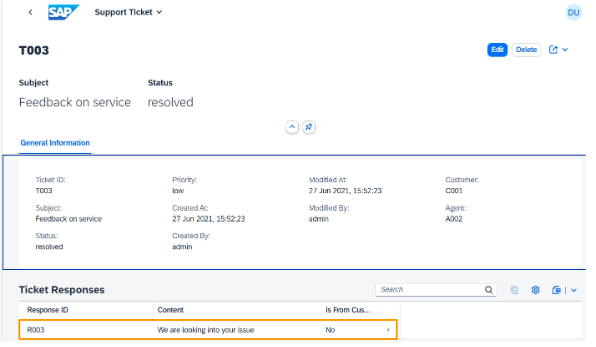
- Click on Responses ID R003 to view the response and its details.
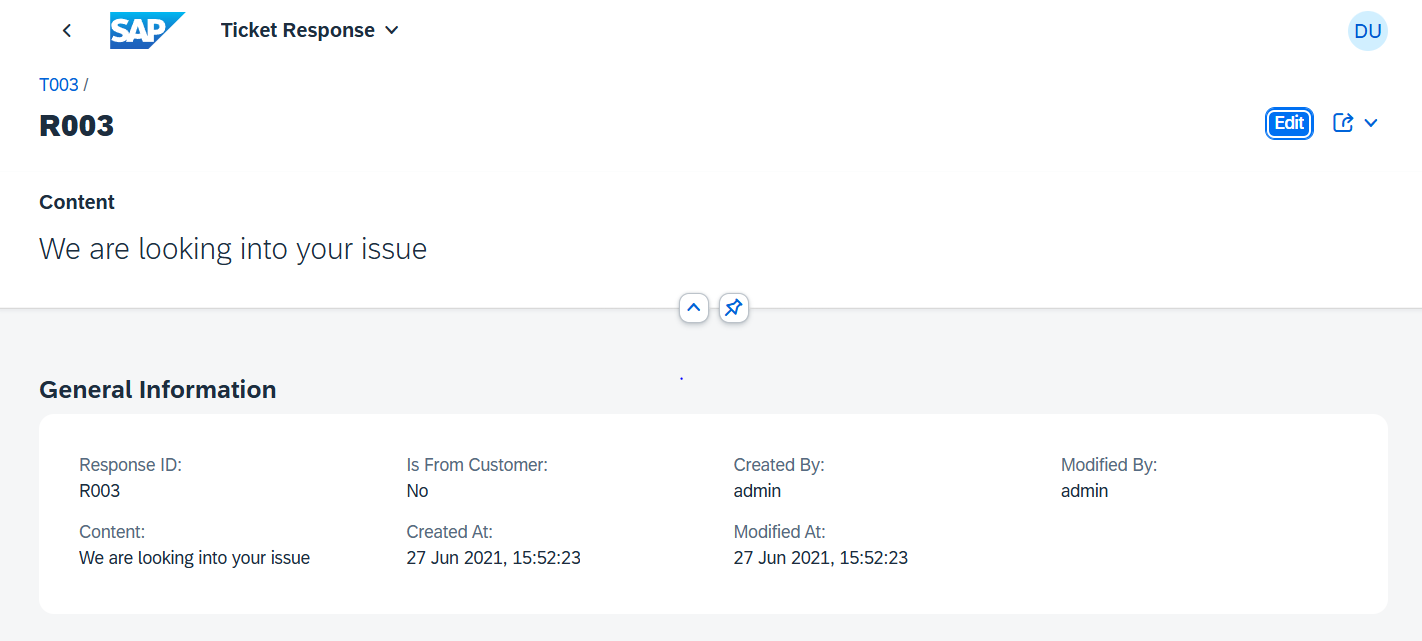
- Congratulation, you have successfully tested the full-stack application created with SAP Build code.
Conclusion
In this post, we demonstrated how to develop a full-stack application in SAP Build Code using SAP Joule and Generative AI. We utilized SAP Cloud Application Programming Model (CAP) for the backend and SAP Fiori UI for the frontend.
We also saw how SAP Business Application Studio serves as the workspace for building the application.
All of this runs on SAP BTP. The built-in AI assistant SAP Joule accelerates development by generating data models, logic, and test data.
FAQs
What is SAP Build Code?
Answer: SAP Build Code is an SAP generative AI-based tool that provides a unified environment for building full-stack applications. It supports the SAP Cloud Application Programming model, SAP Fiori, and SAPUI5.
What is SAP Joule?
Answer: SAP Joule is a built-in generative AI assistant in SAP Build Code that helps generate data models, services, and test data automatically. It makes development faster and easier.
What is Joule Studio?
Answer: Joule Studio is a new capability within SAP Build that enables SAP partners and customers to build and manage Joule agents and skills.
How does Generative AI help in SAP Build Code?
Answer: Generative AI helps SAP developers to automate important parts of application development such as creating data models, writing sample data, and building event handlers. This minimizes repetitive tasks and allows SAP developers to concentrate on business logic.
What is the role of SAP Fiori in full-stack development?
Answer: It provides the UI layer for applications built with SAP Build Code.
-modified.png)

Do you want to
learn more about integration?
We are dedicated to make our knowledge accessible. You can either figure it out by yourself or you can let us give you a hand.
Let us take care of your integration.
We are SAP Certified and we can make your project happen. Explore our services and contact us. We will be happy to take on your project.
View Our Services