
SCC Key Features
- SAP Cloud Connector is an out of the box utility paired free to use with SAP CPI licenses, enables Industry Grade end to end Secure Connectivity of your On-Premise secure applications to cloud-native layer applications.
- To enable Inbound Internet to Intranet connectivity; No Need to open Open Firewall Ports/IP whitelisting etc.
- Supported Inbound Connectivity protocols are: HTTP, RFC, TCP
- Supported Outbound Connectivity protocols are: JDBC/ODBC
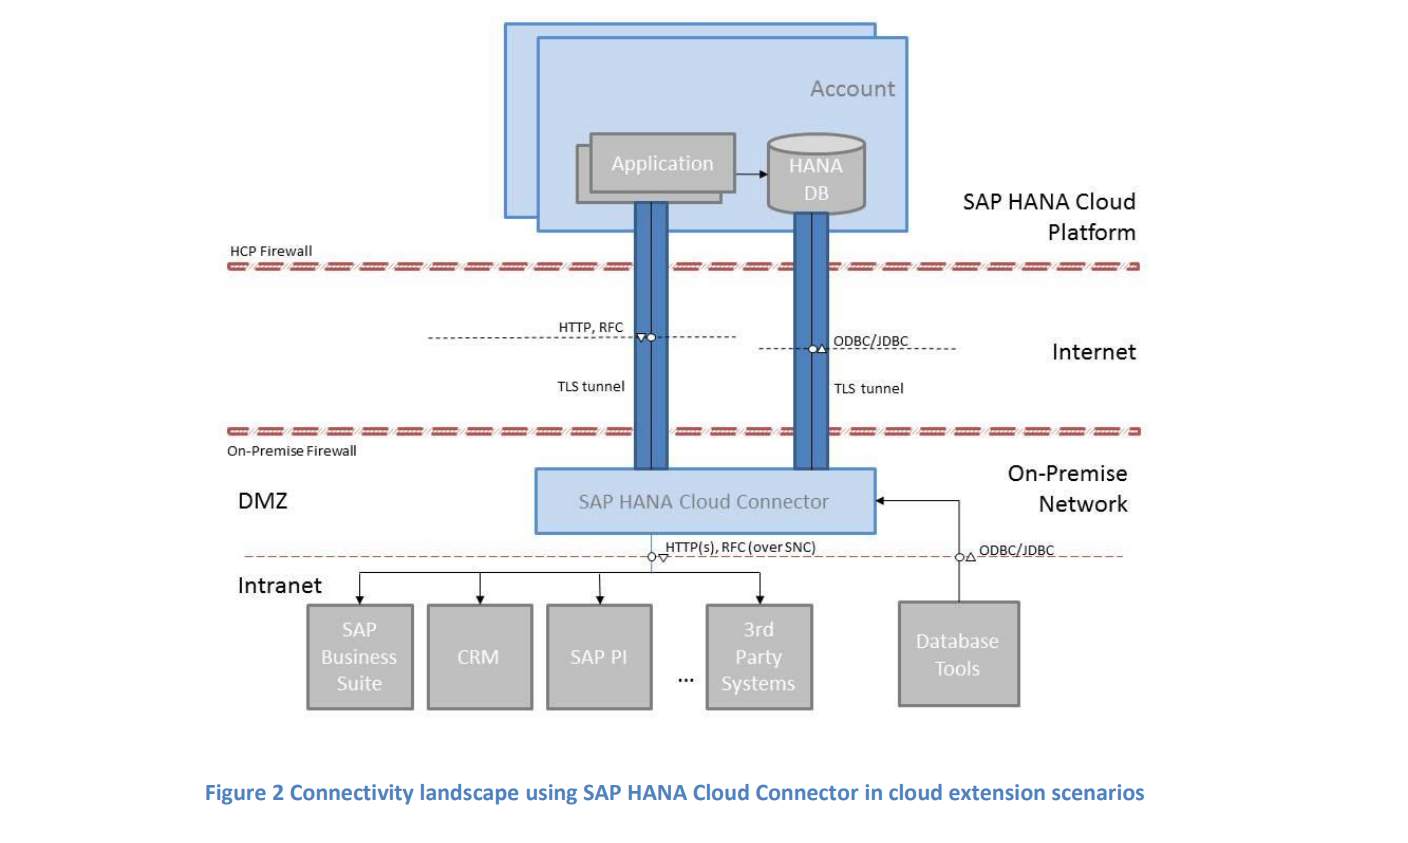
- SCC must be kept ultra-secure and installed at DMZ to ensure “Secure” Intranet Connectivity between SCC and On-Premise applications is established.
- Expose On-Premise systems for Inbound Message Traffic.
- Options to connect via HTTP, RFC, TCP, TCP (SFTP) protocols
- ABT has planned for Two servers, SAP Cloud Connector is
functional and installed on both Windows OS servers for QA and PRD environments. For example,
1ABTQA.corp.local
2ABTPROD.corp.local
Use these Virtual Endpoints in your SAP CPI channels as replacement to actual On-Premise host names, SCC will maintain and host these proxy rules over a Secure VPN tunnel which allows most secure way of exchanging data between SAP Cloud and On-Premise systems.
List of all Cloud Connector On-Premise systems configuration details can be viewed from SAP Cloud Platform cockpit whereas Connectivity Tests can be performed from within SAP CPI.

SAP Cloud Connector (SCC) Installation & Configuration Process:
Step 1: Check the required version and download the installation software from SAP Cloud Platform Tools (https://tools.hana.ondemand.com/#cloud) and Install the Cloud connector on a server on your network.

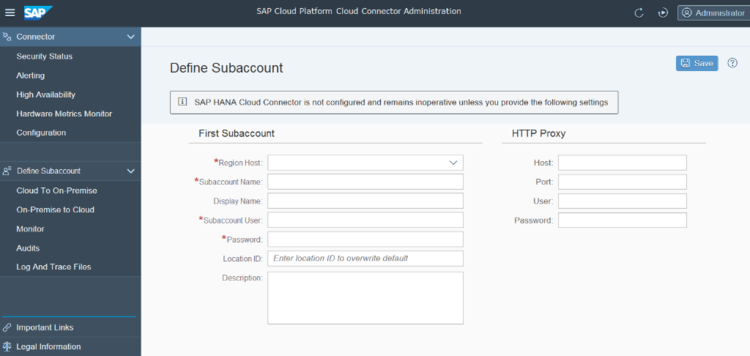
Step 2: Log in to the Cloud connector Administration tool & complete initial configuration. Fill the landscape host, account name, account user and account password.
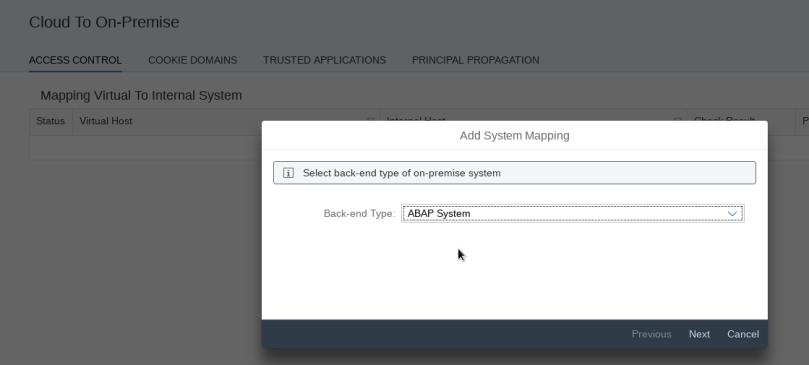
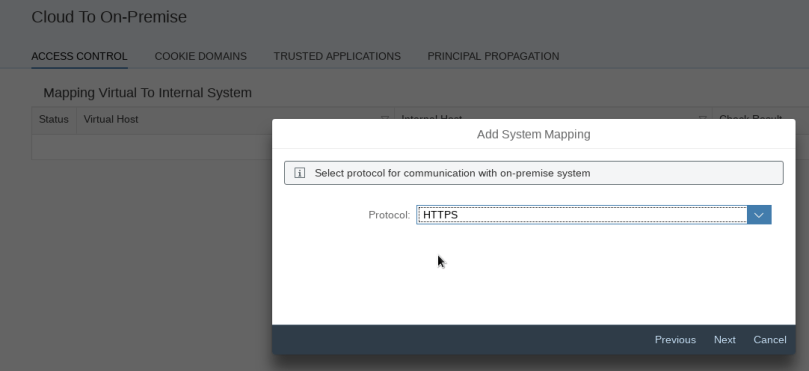
Step 3: Create one or more system mappings from the Access Control tab. Enter a virtual host, virtual port, internal host & internal port in the Add System Mapping dialog box. The virtual host can be a descriptive name such as “myvirtualhost”. Make sure that the virtual port does not have to be the same number as the actual port. For the internal host & port, provide the hostname and port of the Fiori Server you want to mobilize content from.

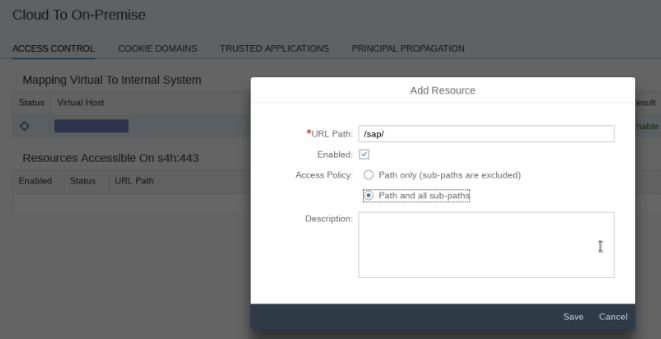
Step 4: For each mapping you have created in Step 3, assign the path to all of the resources on the Fiori server that you want to have available to your application. These resources are the paths to be associated with the server URL to have a complete path to the resources. For example, the path looks like “/sap/opu/odata” and for allowing access to the entire server specify ‘/’.
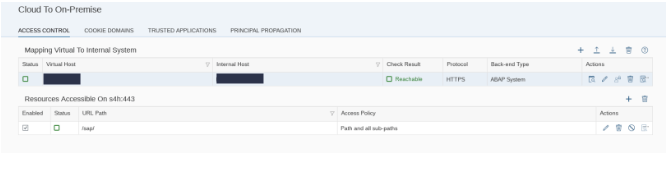
Step 5: Verify that the SAP Cloud Connector is appropriately connected and configured. If it is properly configured then the status indicators on the Connector State page are green and all the connections are Access Control.
-modified.png)

Do you want to
learn more about integration?
We are dedicated to make our knowledge accessible. You can either figure it out by yourself or you can let us give you a hand.
Let us take care of your integration.
We are SAP Certified and we can make your project happen. Explore our services and contact us. We will be happy to take on your project.
View Our Services